
How to Recover Data from a Corrupted SD Card with Travel Photos
Nothing is worse than returning home from an unforgettable travel and excitedly looking forward to seeing your photos, only to discover that your SD card is corrupted. Instead of your memories, Windows might display error messages such as “Card not recognized,” “File is corrupted,” or even prompt you to format the card before you can use it.
The good thing is, a corrupted SD card doesn’t always mean your vacation photos are lost forever. Often, you can still recover them by taking the right steps. In this article, we’ll show you how to recover data from a corrupted SD card and help you get your precious travel memories back.
Why Did My SD Card Become Corrupted?
SD cards can become corrupted for many reasons. Here are some of the most typical causes:
Removing the SD card from your camera or computer without safely ejecting it can interrupt ongoing read or write operations, leaving the file system in an inconsistent state.
Disconnecting the card or losing power while photos or videos are being transferred may interrupt the writing process, resulting in corrupted files or a damaged file system.
If your camera battery dies while saving photos or recording video, the card may not finish writing the data correctly, which can lead to corruption.
As SD cards age, they can develop bad sectors where data can no longer be stored or read reliably, making some files inaccessible.
Connecting the SD card to an infected computer may expose it to malware that damages the file system or hides your files.
Frequently switching the same SD card between different cameras, phones, drones, or computers can sometimes create file system conflicts, especially if the devices use different formatting standards or don't eject the card properly.
Physical damage, such as bent connectors, cracks, water exposure, or extreme heat, can prevent your computer from reading the SD card or accessing its contents.
Like all flash storage devices, SD cards have a limited lifespan. After years of regular use, the memory cells gradually wear out, increasing the likelihood of corruption and data loss.
How to Recover Corrupted SD Card Data
Regardless of what caused the corruption, stop using the SD card as soon as you notice the problem. If Windows prompts you to format the card, click Cancel and avoid making any changes to it. Further use of the card or formatting it will lower your chances of successfully recovering your photos. To recover data quickly and safely, it’s best to use data recovery software. But if this is your first time using such software and you’re afraid that it won’t work or that you won’t understand how to use it, we recommend Disk Drill for lost SD card data. Its clean, beginner-friendly interface makes the entire process straightforward, so you don’t need to be an IT expert.
Disk Drill supports around 400 file formats, including common image and video formats as well as RAW photos from many camera manufacturers. You can preview photos to make sure they're intact and use the recovery chance indicator to identify the files that are most likely to be restored successfully.
Before you start the recovery process, we also recommend creating a disk image of your corrupted SD card with Disk Drill's built-in Byte-to-Byte Backup feature. It creates an exact copy of the card, allowing you to recover data from the image instead of the original device, which is much more safe.

To create a disk image:
Download and install Disk Drill on your computer.
Сonnect corrupted SD card using a card reader or your computer's built-in SD card slot.
Click Byte-to-byte Backup from the sidebar.
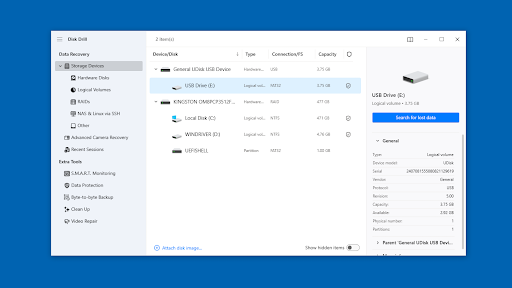
Select your SD card from the list of available devices.
Click Create Backup.
Select a destination folder on a different healthy drive.
Click Save and wait for the disk image process to finish.
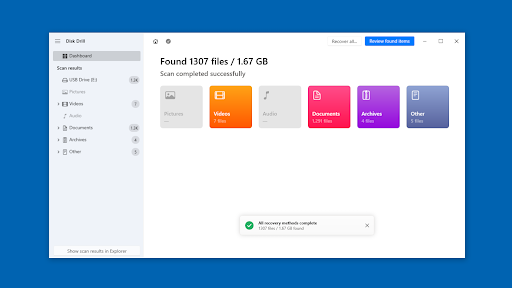
Now that you've created a disk image, you can start recovering your photos:
Go to the Storage Devices section in the sidebar.
Click Attach disk image at the bottom of the device list.
Select the byte-to-byte backup you created and click Search for lost data to start the scan.
Disk Drill offers several scanning methods. For most recovery scenarios, start with Universal Scan, which supports photos and videos. If your recovered photos don't display correctly or appear fragmented, try Advanced Camera Recovery instead. Its purpose is to locate fragmented media files and restore them to their original state.
Once the scan finishes, click Review found items to browse the results.
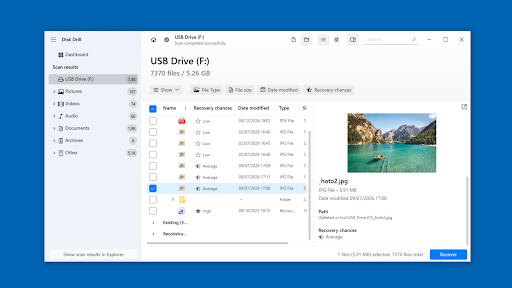
Use the Preview feature to verify that your photos are recoverable before restoring them. You can also use filters to narrow the results or search for specific file formats.
After finding the files you want to restore, select them and click Recover.
Choose a destination on your computer, an external drive, or another storage device. Avoid recovering files directly back to the SD card because this can overwrite other recoverable data that may still be present.
When the recovery process finishes, open several photos to verify that they were restored correctly.
How to Fix Corrupted SD Card
Once you've successfully recovered your travel photos, you can try repairing the SD card. If the corruption was caused by a damaged file system rather than hardware failure, one of the following methods may restore the card to working condition.
Method 1. Use the Windows Error Checking Tool
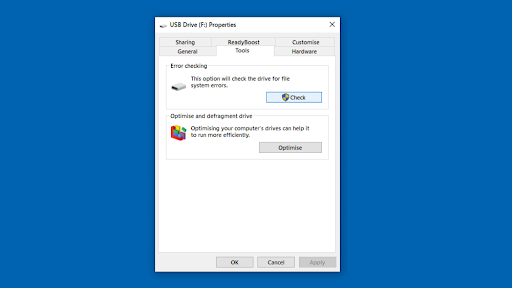
If the SD card is still detected by Windows but isn't working properly, you can try the built-in Error Checking tool. It scans the file system for errors and attempts to repair them automatically.
To run the tool:
Press Windows + X.
Open File Explorer and select This PC.
Right-click your SD card and choose Properties.
Open the Tools tab.
Under Error checking, click Check.
Select Scan and repair drive, even if Windows reports that no errors were found.
Wait for the scan to finish, then reconnect the SD card and check whether it's working normally.
Method 2. Repair the File System Using CHKDSK
CHKDSK is the command-line version of Windows Error Checking. It gives you more control over the repair process by allowing you to use different parameters. If the previous method didn't help, use CHKDSK instead.
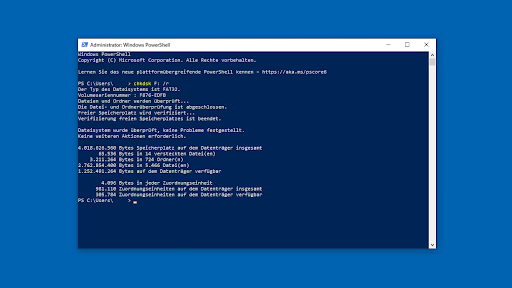
To run CHKDSK:
Connect the SD card to your computer.
Press Windows + X.
Open Windows PowerShell (Admin).
Type the following command, replacing X with your SD card's drive letter:
chkdsk X: /r
Press Enter and wait for the scan to finish.
If CHKDSK finds file system errors, it will attempt to fix them automatically. Once the process is complete, reconnect the SD card and check whether it can be accessed normally.
Method 3. Format Corrupted SD Card
If previous methods don't resolve the issue, formatting the SD card may restore it to a usable state.
To format SD card on Windows:
Connect the SD card to your computer.
Press Windows + X.
Open Disk Management.
Select your SD card and choose Format.
If prompted, enter a volume label and choose FAT32 for smaller SD cards or exFAT for larger SD cards.
Confirm the operation and wait for the formatting process to finish.
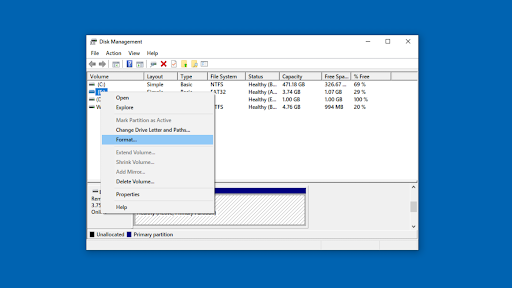
You can also format the SD card directly in camera:
Insert the SD card into your camera and turn it on.
Open the Settings or Setup menu.
Look for an option called Format, Format Card, or Memory Card Format. It's usually located under the Tools or Configuration menu.
Select the option and confirm that you want to format the card.
Wait a few seconds for the formatting process to finish.